June 30, 2010

Pot Holders!!


I firmly believe that it makes life a little bit more enjoyable if you have everyday items that delight you. For example, getting a toothbrush in your favorite color rather than plain white, or a coffee thermos in a pretty floral pattern rather than a plain silver one.

One of my sisters in law (sister in laws?) well, she is my husband's sister, and therefore my sister too. She is a professional costume designer, and is very talented at sewing things. She has recently opened up a little etsy shop to sell amazingly cute pot holders, they are perfect examples of how to make an everyday item something delightful! She sent me a pair for my birthday a while back, and I absolutely adore them. They are made with beautifully vibrant fabric, and are very high quality (better than you would get from target! lol)

Please, if you are looking for a new pair of potholders, or searching for a nice housewarming gift for somebody, check out her shop, Canezou on etsy.

Here are my little beauties

I love them so!

June 25, 2010

Black Beans

When I was a child, I had a very unpleasant experience with beans. A boy sitting at my lunch table chewed up his beans and spit them on to my tray (little asshat). I was so disgusted with this that I never ate a bean again, until my wedding day. Our good friend was the cook for the catering company we hired, and he was so proud of his black bean recipe, that I had to eat some, or risk hurting his feelings. If you were ever a picky eater as a kid you can imagine the internal battle that took place within my head as I got ready to take that first bite. "but...but I don't like beans...I HATE them!!" "yeah, but if you don't at least take one bite and tell him how amazing they are, he will be so sad, because he was so excited to make them for you!" So I did it....and I tell you, I can't believe how delicious black beans are! The whole point of this little allegory is that stubbornness rarely pays off, and can even make you miss out on something delicious for 15 years.

I have made up for lost time however, and have come up with a simple and delicious recipe for black beans that you can use for burritos, eat over some brown rice, or just enjoy alone, as a side. I made these last night, and what made them even better is that I was able to use cilantro and jalapeno (sorry I don't know how to do the tilde thing above the n) from our garden, so satisfying!

JFB Black Beans

1 can of organic black beans
1/4 cup olive oil
1 small yellow onion, diced
2 cloves of garlic, diced finely
1 jalapeno, diced
1 tsp lime juice
1 handful of cilantro, diced finely

Warm some olive oil in a sauce pan. When the oil is hot, add the onion, garlic, and jalapeno. Cook until the garlic starts to brown, and the onion is translucent.

 Drain the black beans and add them to the pot. Lower the heat to medium and squirt the lime juice over the beans and stir everything up so it is well mixed.

When the beans are well heated, mix in the cilantro, make sure to do this right before you serve because fresh herbs loose their flavor if they are cooked too long. That's it, it's a very easy process :) Enjoy!


Black beans are incredible nutritious. They are low in calories, fat free, high in fiber, high in protein, and contain the entire daily recommended intake for hard to find vitamins such as folate. If you would like to read more about the nutrition profile for beans, or any other food for that matter, check out whfoods.org, here is the link to the article on black beans. I really like whfoods because it's easy to read, and includes a little history and also gives advice on choosing the food at the store (like how to pick ripe produce) as well as how to cook the various foods. It is a cook friendly nutrition database, by that I mean, they do not sacrifice the flavor of a dish just to make it as low in calories or fat as possible. They also believe that health is not just about the absence of disease, rather, it is a state of happiness, and freedom. I heart them :)

June 21, 2010

Holy Cow!

I just put in my resignation at my job! I had a revelation on Friday that this was it, I was done working here. I'm not really motivated to do a good job anymore, and me leaving is best for everyone. My supervisor was really nice and understanding when I told her. So now I just have 3 more weeks left and I'm out!

What comes next?

I am going to be looking for some kind of yoga related job, but until I am actually a certified teacher I can't start teaching. I might just get a part time waitress job, or working  retail, just to tide me over until I get enough teaching gigs. We'll see what I can find. Honestly, I am just excited for a change of scenery. I feel like my life is becoming everything I dreamed it would be.

I fully intend on keeping this blog and updating it as much as possible with my kitchen adventures and other random musings. Don't be surprised if I start quoting ancient Sanskrit texts, because I have been reading lot's of them lately for my YTT ;)

I have a few posts planned for this week, including a garden update, so stay tuned!

June 14, 2010

Pretzel Turtles...not as weird as it sounds.

Yes, I have to review another recipe from another blogging buddy, Ali from Three Baking Sheets to the Wind.

This Saturday, all the folks in my YTTP got together for a BBQ, except it ended up being more of a dinner party inside due to some completely un-Colorado-y rain that lasted the entire day (our rain usually only lasts 10 minutes!). Well our get together was a pot-luck, and I wanted to bring something snacky and fun. Lucky for me, the day I decided to search for recipes was the day the Ali decided to do this post on Pretzel Turtles.

She found this recipe from Rachael Ray Everyday, but if you are going to try these, you must use Ali's version, because let me tell you, she is one funny gal...just go to the link and see for yourself. Her pictures also make following the recipe extra enjoyable :)

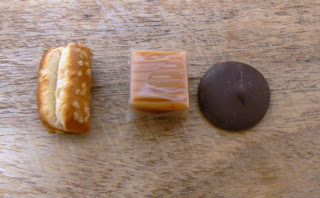
Just so you know what your are getting yourself into: these are basically pretzel nuggets, wrapped in caramel, dipped in chocolate, covered in almonds... I know...YUM! They are easy and fun to make, however, for me, they were time consuming. This is a perfect thing to do on a weekend afternoon, possibly with children (they would have a blast wrapping the caramel!).These little guys are delicious little paradoxes, sweet and salty, crunchy and chewy. Also, since I have been posting so much about eating healthily lately, I feel the need to balance it out with something indulgent.

Enjoy!


=

Disclaimer: These photos were taken as I was rushing out the door, I am sorry for their poor quality, they do not do the pretzel turtles justice, what-so-ever. A better camera is definitely on my list of things I want.

June 9, 2010

Online calorie tracking

I have been tracking my caloric intake and physical activity for about 4 months now, because I am actively trying to loose a little weight I put on when I started sitting at a desk 40 hours a week. I use the "MyPlate" tool on Livestrong.com.

This is a healthy living website brought to you by the foundation of Lance Armstrong. Basically, the MyPlate tool is an online food and exercise journal, you enter everything you eat, and the amount of physical activity you do, and it shows you your overall caloric intake (minus calories burned). It also shows your intake of basic nutrients like sugar, protein, and fiber versus the recommended daily allowance (from the FDA). It is free to use, but they only keep your journal for something like 40 days, than it is cleared. You can pay for a higher level membership, and they will keep your journal forever and you get more features, but for me, just seeing the calories add up daily is really useful.

I love the MyPlate feature because you can search for specific foods from specific brands or restaurants. I mean, they have everything! My Toufayan whole wheat pita, and Sabra classic hummus? Yep, they have the nutritional info, confirmed from the manufacturer. They have the nutritional content of many dishes from small and large chain restaurants (like Chipotle, Noodles & CO., Pei Wei, etc.) as well as the info for basic foods like fresh fruits and veggies. You can also add in your own recipes and get the nutritional analysis for them, it's pretty amazing.

I have always considered myself a pretty healthy eater, I don't eat fast food, or fried food, I rarely drink soda, and I almost always eat whole foods, rather than pre-made packaged stuff. Still, I was surprised at how quickly the calories add up in the day, and especially shocked at how hard it is for me to keep my sugar intake under the RDA. Seeing my calories add up using this tool has helped me "just say no" to unnecessary snacks, bites, and tastes, because it is just not worth the extra calories. So far, using this tool, and being more active (hello YTTP doing yoga 20 hrs a week!) I have lost about 5 lbs of solid fat (not including water weight fluctuations) in 2 months, but more importantly, I have lost inches. I can fit into pants that wouldn't even button back in February!! That is freaking satisfying!

Disclaimer: I am not paid by any of the companies or services I recommend or review on this blog (unless otherwise stated). I just like to share things that I find interesting or useful!

June 8, 2010

Cadaver Lab

Last night, I got to participate in something that I will never forget. Last night was one of the best nights of my life, it was one of those nights where I was hit with such a blinding flash of inspiration, and also moved to tears by how amazing life is. I might risk sounding morbid, and maybe even slightly creepy, but last night we did a cadaver lab for my YTTP and it was one of the most beautiful things I've ever seen.


I want to start this post off by saying that I have a profound sense of respect and gratitude to the people who have decided to donate their bodies to the cadaver programs that make these labs a possibility for students. Once you see what the inside of a human body actually looks like, how everything fits together so perfectly, how intricate it all is, you never look at another person the same again. Through participating in cadaver labs, I have gained an immense respect for human life (and all life forms for that matter).

In college, I took anatomy, and we had a semester long cadaver lab, but those cadavers were dissected by the lab TA, who is by no means a professional, and it was very hard to see the difference between the tissue types, the shapes of the organs, etc. Everything kind of looked the same. The lab we went to last night was completely different. These cadavers were preserved with such great detail that they were infinitely better than looking at a plastic model.

We began with the extremities, and were able to see all the different muscles, ligaments and major nerves of the arm and leg separated out. Then we saw the whole body, the skeleton with the muscles. We were able to see the major muscles used in yoga, and how they are positioned in the body. Then he showed us all the major organs, and where they are positioned in the body, each was accompanied by a lecture and discussion about how that organ is affected while doing yoga. At the end of class, we had a whole body, put together again. It.Was.Amazing. It was very moving for me to hear somebody from a scientific background talk so beautifully about how yoga benefits the body and mind in so many ways. The lab director who gave us the lecture and demonstrated the cadavers (he also does the dissections) really understands that the human body is more than just a bunch of different parts put together. He talked about how the mind and the spirit have a profound effect on the physical state of the body.

The word "Yoga" can be translated to mean "Union". Ultimately, the goal of yoga is to create a union between the body, mind and spirit. In my YTTP we are inspecting each of those things in detail, in order to gain a more intimate understanding of how they can all fit together. I am so grateful to be in this program, I just can't even put into words how much I am growing from this process.

June 7, 2010

Burger Review!

Burgers on the grill are the harbingers of summer, one fleeting whiff of the burning charcoal and meat can send me into an elaborate day dream involving cute summer dresses, bare feet, beer, fresh fruit salad, strings of pretty garden lights, and of course a deliciously juicy burger, just off the grill.

My blogging buddy Liam at My So-Called Knife, posted his recipe for the Perfect Burgers a few weeks ago, and I got the chance to try them out on Memorial Day. His recipe intrigued me because of its use of interesting and exciting ingredients. Unfortunately, on the big day, I woke up with a terrible cold, and no sense of taste, due to a stuffy nose :( Never-the-less, I forged on and made these for my family to enjoy, and enjoy they did. My mother, grandmother, sister, husband, and brother-in-law all declared them the "best burgers ever!" I think is has something to do with the pork sausage...my family has an unhealthy obsession with pork... Even in my sick state, I thoroughly devoured my burger, and it was juicy and perfect, even though I couldn't taste it as well as I wanted too :)

This recipe is also great because he goes into the subtleties of burger making, a great way to take your burgers to the next level of awesomeness!

From MSCK:
"My perfect burgers call for a mix of ground beef and sausage, at about a 70%/30% ratio. I could probably increase the perfection quotient on the burgers if I started grinding my own meat, but that will have to wait for another day. I also occasionally have been known to use some buffalo meat in the mixture if I can get a good source for it. But for this base recipe, we’ll just go with the beef and sausage.


Perfect ingredients…

- 1 lb ground beef (you can go lean if you want, but I usually don’t)
- 1/3 lb pork sausage (Italian, sage, mild, spicy, whatevers – mix it up)
- 2 heaping spoonfuls of sour cream
- 5-6 splashes of Worcestershire sauce
- 1 c bread crumbs
- 3 or 4 slices of cheese (I used Swiss in this iteration)
- 1 egg (optional)
- hamburger buns

Perfect toppings…
- 1/4 lb bacon
- lettuce
- caramelized onion
- raw onion
- mushrooms
- tomato
- your favorite ketchup/sauce

AWESOME ALERT! I got to use my own lettuce for this, grown in a container on my back deck. It’s the first non-herb food product of any sort that I’ve eaten that I have grown myself. I had to have a moment.

Anyway.

First thing you want to do is fry up the bacon for topping. Fry it in a skillet (cast iron if possible), and as it’s frying prep your toppings – slice up the tomato, onion and mushrooms to appropriate size pieces.

After the bacon’s finished frying, take it out of the skillet and lay it out on a paper towel so the oil will drain off. Reserve bacon fat in the skillet and set aside, we will be using it later.

Next, set out a large bowl and put in the beef, the pork sausage, the sour cream, the bread crumbs, the Worcestershire sauce, and the cheese. Break the cheese up into small pieces as it’s going to be mixed in with the burger meat.

You can add an egg here into your mix, I occasionally do, but if you do then you probably want to add more bread crumbs – with the sour cream and the sauce in there already, it gets pretty runny if you add an egg. Top off with more bread crumbs if it is too liquidy, until you get a consistency that’s solid enough to stay together on your grill.

Step away from your bowl now and go fire up the grill. If you’re using a charcoal grill, fire it up 20 minutes ago.

Take your hands and mix all the ingredients in the bowl. You will get good and messy here, so just suck it up. You want to make sure all the ingredients are mixed thoroughly but try not to over-work the meat.

When forming your burger patties, go for something a little bit smaller than the size of your fist. Flatten it out a little bit in the center but not too much. You want it to cook evenly so bear that in mind as you are making the patties.

By now your grill should be pretty warm and ready to go.

Cook the patties over a medium-high flame for 7-9 minutes. You should see the meat browning just shy of half way up the patty when it’s ready to flip. Cook the other side another 7-9 minutes.

Whatever you do, do not flatten your burger patties while they are on the grill. I’ve known people to have a tendency to do this, thinking that if you flatten them they will cook more evenly. Well, they might, but in doing so you’re squeezing all the juices out of the meat when they could be cooking into the burger and you’re losing all your flavor.

Optional bonus: sear over high heat for just 1-2 minutes on either side right before they come off the grill.

While the burgers are cooking on the grill, heat the bacon fat in the skillet back up. Sautee the mushrooms and onions in the skillet in the bacon fat. Take them out after the onions have browned slightly and the mushrooms have taken on a semi-transparent quality. Set aside on a towel to drain.

Can’t make a perfect burger without perfect toppings.

Take burgers off grill. Top with awesome toppings. I like to use Bigg Riggs Awesome Sauce instead of ketchup. It’s technically a wing sauce, but I like it on all kinds of stuff.

Eat. Enjoy. "

Liam, my family and I thank you for making our Memorial Day, Memoriable...memorable...you rock!